Monday, June 29, 2009

My Hard Drive!


Hey!!! That's my hard drive! Each little box is a file or folder, and different colors mean different filetypes. I'm going to start a timeline on my ceiling of these pictures which I will do monthly. To do this, all you have to do is unscrew your computer, take out everything inside, take your hard drive, take an x-ray picture of each segment, then stitch it together. Or, you can just use GrandPerspective (The easy way, which of course I took just like I took the path to using a Mac).

But to take that picture, I just put it as large on the screen as I could and ued the Command-Shift-4 command to take a screenshot of a selection of the screen, which in this case I selected the image inside of the GrandPerspective Window (sorry PC users!). Sorry PC users, you AWESOME Mac users can download it right HERE, and the homepage is right HERE!

2008-2009, what a messed up year it was...

I'm sorry to say this, but yet another tragedy happened yesterday. Billy Mays, the "king of commercials," passed away.


I'm just looking at this past year and 2008, and it seems to be far more worse than 2006 (Steve Irwin's death). Just look here:
  • Michael Crichton: died November 4th, 2008
  • Michael Jackson: died June 25th, 2009
  • Billy Mays: died June 28th, 2009
I don't know what to say. Oh and another thing, their ages were very similar. Their ages were very close to each other, if not almost identical, except for Crichton. Michael Jackson and Billy Mays were both 50, while Crichton was 66.

What can I say about these great people? RIP.

Sunday, June 28, 2009

How to put PDFs on an iPod touch/iPhone

I have been asked many times how to do this, and the answer only requires one thing: an email account. Web-accessible, hopefully. Really, all you have to do is open up the internet browser on the computer with the PDF you would like to view on your iPod touch/iPhone, and go to the email account that you have setup in the Mail application on the iPod touch/iPhone. If you have it setup in a downloaded client, it all works as long as it supports attachments. Simply compose a new message, and where it says To: put in your own email address, or the email address on your iPod touch/iPhone mail application. Now, attach the PDF file, and type in something as the subject. It would be most wise too put in the name or title of the attachment, so you can find it later.
Now, send it off. You will receive the email on your iPod touch/iPhone, and you will see the name of the PDF file in the email. Tap it to download it, and then it will open. Voilá!

You can now also rotate to view it in landscape, and pinch to zoom in and out. You can view this file even when not connected to the internet. Yay!

You might want to move this to create a folder in mail called PDFs and move all of these emails to it (just a tip).

Saturday, June 27, 2009

RIP, Michael Jackson

As all of you know, Michael Jackson, the "King of Pop" passed away this last Thursday on June 25, 2009. The first time I had heard about the news was on that day at around 2PM from a couple of my friends' statuses on Facebook. I didn't believe at first, and after a Google search, it turned out he was dead. I the IM'd a friend of mine on AIM to tell him the news. He heard about it, and said that he infact ISN'T dead, only in a coma. He gave me the LA Times link, and indeed it said he was in a coma and that he'll be fine. Then, a few minutes later the story dissappears and it is replaced with the story of Michael Jackson actually being dead. So, apparently he died.

It was a big shock to everyone, and that was also the day that my Internet went bad aswell. So I had to be updated via my mobile phone, which is an LG Chocolate 2 with a crappy web browser with no Flash or Javascript.

So, in order to commemorate the memory of Michael Jackson, I have made a couple wallpapers for you all to download and set as your current wallpaper. Here they are:

1600x1200 (4:3):
1920x1200 (16:9):
Feel free to download and share as you like, after all he was a soul in pop and has touched all of our hearts with his great singing and dancing.

--Sergey. RIP, MJ.

Friday, June 26, 2009

Max's Internet Speed


Well, My Ineternet speed isn't as fast as sergey's but I'm happy with it. Finally Sergey and I will be able to do file transfers with a speed more than 1 KB per second!

New ISP, New speed.

This was one crazy morning yesterday. My Internet died, and so did my home phone. That means that I was knocked out of Internet or home phone service for good. As everyone probably knows, I'm a big hater of AT&T's Cellphone service, and now I'm a big hater of AT&T completely. Not only have they served my family some crap service for the past 15 years, but they haven't been listening to use AT ALL.

Now, I'm with Comcast High-Speed Internet. Hecka fast:
EDIT: As compared to my OLD speed....
Woohoo!

A cool thing about Comcast as compared to AT&T (formerly SBC): is that AT&T uses the phone line, while Comcast uses the TV cable, meaning I get internet via the TV line now while AT&T uses the phone line. Pretty neat, huh?

EDIT: LA Times has confirmed Michael Jackson's death... which makes it an even crazier day.

Wednesday, June 24, 2009

FORUM!!

Hey people with computers!

If you need any help, come join our forum right HERE!
Just create a new topic the your OS's Category. we are working towards maybe adding one for the iPod touch (no iPhone, AT&T SUCKS.).
But really, please go on our forum, add some new topics, do whatever. The AllWindowsHax team will try to reply to your questions ASAP.
And if you want to tell your friends about it, tell them to go to http://bit.ly/awhforum!
or, go to allwindowshax.lefora.com (just use the shortened one). Also, become fans of us on facebook, and add us on twitter (username: AllWIndowsHax)!

Dual Boot Windows 7 and Ubuntu

Sorry, there is pretty much no way to install Ubuntu on a Mac, because the needed partition formats are not recognized by any mac hardware, including the built-in GRUB-like boot loader. I tried this for myself, and I ended up taking it to the apple store and having them completely wipe it out like brand new. That was not that bad, because I had a clone from Carbon Copy Cloner. in setup, I imported everything back from the drive.

But this post does not involve my MacBook. This involves my 40GB HP dv1000 Entertainment Notebook PC.

After I got my MacBook, it turned into a whatever computer. I don't like this OS. Reformat. Oh, something wrong. Reformat. It originally had Ubuntu, then fedore, then OpenSUSE, then Windows 7. But now, I'm using Ubuntu and Windows 7 together. I have had some experience dual-booting, and now here I am again.
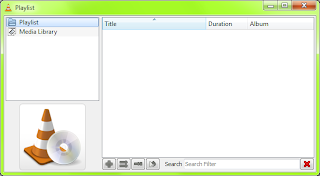
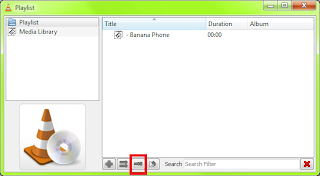
I just tested how I did this, and it works great. Please don't mind the pictures, because during installation there are absolutely no ways to take screenshots except for with a camera.

1. Make sure you have another computer or hard drive yo useas your primary, unless of course this is brand new computer with nothing on it that you want to use as your primary computer.

[1.5. If you are not sure about your hard drive being empty or maybe still have a little data on it, download DBAN (OVER HERE!!!), a free CD that wipes out your whole hard drive and leaves it unallocated.]

2. Download the disks! get the ubuntu disk from Ubuntu.com and the Windows 7 disk from microsoft.com. Finding the ubuntu download is really easy, finding the Windows 7 download is like finding the needle in a haystack (good old microsoft, eh?). This does require a HotMail, er, Windows Live account.

3. Boot from the Ubuntu disk. Select your language and the select Try Ubuntu without any change to your computer, then hit enter.


After a couple of seconds it will start to boot from the CD. this may take a while.
4. After you have been brought to the GNOME desktop environment, in the menu go to System>Administration>Partition Editor. This will open GParted.


The whole box should look gray and say unallocated. If it has two boxes, go to Device>Create Partition Table. The application is known to sometimes crash while doing this, but even if it crashes it creates the partition table.

5. My hard drive is about 40 GB. Windows 7 takes up a lot of room to install, and Ubuntu takes up very little room. I am going to give about 12GB to ubuntu, and the rest (about 20 GB) to Windows 7. To do this, just click the unallocated box, and click new.


Now I will try to put it something around 12GB in MB form. I am going to put it 12000 MB. You are going to want to format it as ext3, no label, and create it as a primary partition. then click Add.

Now, select the rest of the unallocated space and click new. It will put everything in place for you, but you just need to make sure it's primary and fat32. This is not what windows installs on, but it is just to make sure windows installs on the correct partition in the future.
Click Apply and wait for it to finish and then close GParted.

Go to the top right of the screen and click the power button, and shut down.
It will shut down then pop out the disk. leave the tray open and press enter.

6. Now remove the Ubuntu CD and put in the Windows 7 CD. Keep the Ubuntu CD nearby, because you will need it again soon. Close the tray and boot from the CD. Make sure you have the serial code you (should have) printed out.

The CD will boot and then say Windows is loading files...


Wait for it to load, and then it will "start windows" with a fancy animation.
Now, put in language, currency and time, and keyboard and input method. Click next.
Now click install now!!! YAY!
But were not done yet. It will "start setup" and bring you to a window. Accept the stuff and click next.
Here is where people get mixed up. You want to click Custom at this screen.

Now it will bring up the partitioner. Click on the bigger partition there, and click Drive options. Now click Format, then click OK.


Now click Next. YAY!! It will install windows, which takes a while (sounds like microsoft, eh?). Go have a cup of coffee and a snack while you wait.


After the install, you will get a screen like this.

Put in your info and click next. Put in your password(s) and click next.
Now, you will get a screen like this. Here is where you enter your product key that you (should have!) printed out. Punch it in and click Next.


Now just use recommended update settings. This keeps anything from bothering you about updates. Select your time zone and click next. If you desire, connect to your wifi network. That part I really don't think I need to guide you through.

It will finish setting up your settings and prepare your desktop. After, you should be welcomed to a desktop like this:


7. Install Ubuntu! Shut down Windows 7 (Start>Shutdown (duh)) and remove the disk. Then put in the Ubuntu disk and boot from it (again).
This time when it asks you if you want to try ubuntu without any change to your computer or install, select Install Ubuntu and hit enter.

You will get the ubuntu boot screen, and then you will get this screen.


Select tour language and click Forward. The next 2 steps I shouldn't need to help you with.
Now it will give you the partitioner. Here you want to select Specify Partitions Manually.

Click Forward. Select the ext3 partition you made and click Edit Partition. I think I want a swap partition (Ubuntu recommends it), so I am going to take away 1000 MB from the ext3 partition. Click okay and accept it might take a long time. Now, select the free space you made and click New Partition. Make it Primary and at the beginning, and use it as swap area. click Okay and it will turn it into a swap partition. Now select the ext3 partition and click Edit Partition. Under Use as:, select ext3 journaling file system. Select Format the partition (just to be sure) and under mount point select /. click Okay and click Forward. Now enter all of your desired info and click Forward. I am not going to migrate anything, so I am going to just click forward again. Now it will give you a summary of everything. Now you can click Install.

I know, you are probably thinking " Hey what do I do when I boot? Won't it get mixed up by which partition to boot from?" The answer is No. Ubuntu will automatically install the GRUB boot loader.

Okay, you're done! Click Restart Now to see what I mean about GRUB.
I Selected Ubuntu and hit enter to boot.

Now, you will get a snazzy "enter your username and password!" drum sound, as well as a sweet login screen.

I'm gonna log in and WHOW. you get a fancy login sound.
Welcome to the world of dual-booting Ubuntu and Windows 7!

I recommend keeping all of the partitions and other computer in sync (for free!) by getting Dropbox. Works on any OS, and is a folder on your computer that is the exact same on every computer. Basically, if you add a file to the dropbox folder on one computer, it will appear in the dropboxfolder on all of your other computers liked to the same dropbox account.

The best computer prank - EVER!

Hey everyone, it's me, Sergey, once again with a brand-new post.
This one will, for sure, make you laugh.

So, let's go over the details of this prank. This is the prank where you turn on the Banana Phone song by Raffi for a long period of time and annoy your roommates/coworkers/your boss. This is exceptionally funny when done perfectly and in a good environment such as a college dorm room, cubicle, or even your own home. And the best part is, that it will work on ANY computer with sound!! Okay, so first off you need:
  • A computer (preferably your own, as you might need permission to install)
  • Speakers
  • Internet connection
  • A room
  • Power (if on a laptop)
  • Somebody to annoy (<.< ... >.>)
  • Some *free* time
  • an escape route
Now, once you have all of that, it's time to start doing it.

First off, find a time when the person you're trying to annoy is not in your vicinity, such as he went to a class, or he went out to get some lunch. Go to your computer, and download VLC player from HERE. Download and install, and you should have it open.

Now, go and download the Banana Phone song from HERE.

Once you have done the above, open a playlist in VLC by pressing Playlist>Show playlist. You should get this window open:
Now, click on the + button on the bottom of the window, select Add File and navigate to where you have downloaded the Banana Phone song. Click on Enqueue to close the window and add the file to the playlist.

Now, click on the Repeat button twice to get a continuos loop, unless you already have your playlist in that loop (in red, below):
Now, go to the player and press the play button:
Now, LOCK YOUR COMPUTER and get out of the building as quick as possible and go somewhere for a few hours. A good way to do so is to do this in the morning and come back at night. Oh, and make sure the other person doesn't have permission to touch your computer. Say you'll f*** them up if they do so. Oh and mind the speakers.

Monday, June 22, 2009

iPod Touch 2nd Gen. 3.0 OS Jailbreaking

I'm sure you all know that not that long ago Apple has released the new iPhone/iPod Touch 3.0 Firmware. Probably most of you iPod and iPhone owners have already upgraded to this version of the software as many apps in the App Store do not work on the out-dated 2.2.1 software.

So, let me tell you about the Jailbreaking process and the Pro's and Con's of the whole business.

Before we proceed, we are going to assume that your iPod Touch 1G, 2G, iPhone 2G, 3G (with the exception of the new 3G-S) have been updated to the new 3.0 software, unjailbroken. ALLWINDOWSHAX MAY NOT BE HELD RESPONSIBLE FOR ANYTHING HAPPENING TO YOUR IPOD OR IPHONE. Another thing, this whole process was done on an iPod Touch 2G in Windows 7 RC. I do not guarantee that this will work on other operating systems, but in theory, it should. Proceed with caution.

Now, let's go over the legalities. What you are doing to your iPhone/iPod is not favored by Apple, and AND DOES VOID THE APPLE WARRANTEE. Even though Apple might not sue you for you doing this, it is highly recommended to not jailbreak your iPhone/iPod at all. Again, we are not responsible for anything happening to your Apple device, but if you are going to Jailbreak your device, please be extra cautious, as this may also harm your device as well. Oh, and another thing: if you piss in your pants for the fear of screwing up, we will not pay the cleaning bill either.

So without further adue, let's get started with this!

First off, you need the firmware of the iPhone/iPod 3.0 software. You can get it here from the second drop-down menu: LINK. But please, don't use this link to pirate the software. You should buy your own (or download if you have an iPhone) software from the iTunes store.

Now that you've gotten the firmware, it's time to get the gear that does the bulk of the job, Redsn0w 0.71. You can download Redsn0w here: Windows XP, Vista, 7; Mac OS X Tiger, Leopard.

Now, connect your device, and wait for you operating system to recognize it and get settled. For Mac users, this should be almost instant, but for Windows users they might have to wait a minute, no big deal. Again, MAKE SURE YOU HAVE THE 3.0 SOFTWARE ALREADY INSTALLED!! I'm not going to reply to comments saying "Ohmigawd I just f***** up my iPod cuz I didn't install the 3.0 software!" and they will be deleted once we see them.

Now, open up Redsn0w from the zip file. (If you're using a Longhorn system, such as Windows Vista or 7, grant it permission.) You should get something like this (for Mac, it should be similar):
Notice the "Browse" button. Click on it, and navigate to the firmware you downloaded earlier. Wait a few moments for it to recognize the IPSW file, and click "Next."

Select the check button that says, "Install Cydia." Cydia, is an iPhone/iPod application that is ONLY available for jailbroken devices. The app itself is basically a jailbroken version of the App Store, but all of the downloads are free and many of the apps are third-party apps that did not make it to the iTunes App Store. A lot of these downloads are also Themes for the iPod and iPhone and, in my opinion, it also looks very cool. So anyways, you should be here:
Now, click on "Next."


Now, only click next if you are SURE that your device is both PLUGGED IN and TURNED OFF. Again, this is an imporant step. Click next. Oh and by the way, keep your finger on the power/lock button on the corner of your device.

Now, this screen should appear. Hold down the power button for 3 seconds, then without releasing the power button press+hold down the home key for another 10 seconds, and then without releasing the home button, release the power button BUT KEEP holding down the home key for another 30 seconds. This step will put your device into DFU mode. (Note: you will be guided and timed, so you don't have to count! What a service this program is too!!) This is what you should be seeing:
Now, once the screen changes, you should be able to see some progress bars. You may now release the buttons, and let the Redsn0w do the rest. You should see, on your device, an Apple hard drive icon with a green arrow with the Serif text saying "Downloading Jailbreak Data" underneath it.

In a minute or two, Redsn0w will say it's done. Woohoo! You just jailbroke your Apple device with the 3.0 software! Go ahead, have a beer or two. After all, you took the risk ;-)

Congrats.

Oh and by the way, if you can, you can download the Wall-E theme via Cydia:
Good Luck ;)

Installing Windows 7 on a MacBook


WARNING: BACKUP ALL OF YOUR DATA (Great free solution for Mac: Carbon Copy Cloner (Sorry PC users!!)) BEFORE ATTEMPTING THIS X-TREME GEEK STUNT!!!
ALLWINDOWSHAX Is NOT responsible for any problems that may occur.

The joy of using any windows program for free* is great. Although Windows 7 is still in Release Candidate, it still impresses all of the crowds worldwide. It is claimed that the win7 install uses the same specs as previous windows editions, which includes the 2 golden requirements:
1. NTFS format!
2. Supports XP/Vista software!

So I took the risk of installing it with Boot Camp. Since I had failed multiple times in the past with ubuntu (didn't meet the golden requirement of NTFS format!) which messed up my partition map, Boot Camp didn't like it. Thank you carbon copy cloner because I had all of my stuff backed up, so I brought it into the Apple Store and let them wipe it out and reinstall. Upon turning it on, it asked if I wanted to import any settings, apps, and files from another mac or hard drive, so I just plugged in my backup drive and I was able to restore everything, and still have a clean single partition. So after all of that Boot Camp was happy again. :-)

I created the new partition (FAT16) with Boot Camp and downloaded the Win7 cd and got the key. I popped in the CD and I was met by an easy instaler. I reformatted the FAT16 partition as NTFS and installed on that. The install went smoothly, and there was only 1 thing left: Drivers. This is where the second golden requirement comes in.

The leopard install disk that came with your Mac includes the drivers compatible with Windows XP and Vista, and not for any other OS. Luckily, Windows 7 works with all windows software, which was a large glitch in Vista.

The driver install went cleanly as well, so here I am able to run any PC application without the purchase* of Windows.


*In many cases still requires purchase of software.

Hello!

Hey all,


Welcome to our new blog, AllWindowsHax. We have *officially* given up on our site, AllWindowsHax.FreeWeb7.com, as its uptime was terrible and it usually didn't work for some reason. Just stick around, we'll keep you updated!

--Max and Sergey

Sign up to be an author of AllWindowsHax!

Do you think you have what it takes to be an author of AllWindowsHax? If you do, the fill out this form. Being an author of allWindowsHax uses an easy-to-use web-based interface for posting, so you don't have to download anything. Being an author of AllWindowsHax is free, and you don't get paid any amount. After filling out this form, AllWindowsHax will decide if you are eligible to become an author of AllWindowsHax. If you are, you will get an email from sergeydgr8@gmail.com or swisherdgr8@gmail.com. Good luck!


Full Name (First Last)


What is your occupation?


Email Address:


Years of computer experience?


What mobile devices do you use? list them here.


What do you do mainly on your computer (Examples: Coding, Email, blog, video editing (be specific))


Have a Twitter, YouTube, blog or website? List the urls of any of your web pages.


Computer Specifications


Select your computer's brand.

Apple

Dell

HP

Acer

IBM

Axiotron (GRR)

Alienware

Psystar (GRR)

Toshiba

Vaio

Asus


Operating System?


What is your computer's Model? (Example: Inspiron 537)


Processor (Example: Intel Core 2 duo 2.0 GHz)


RAM (Example: 2 GB DDR3)


Hard Drive(s) (Brand, Type (SATA, etc.), __GB)


Display(s) (Example: 13" MacBook, 17" Gateway (extended desktop))


create web form